TerraWeek Day 4 🌱

This is#TerraWeekchallenge under the guidance ofShubham Londhesir.
Introduction:
Welcome to TerraWeek Day 4! Today, we're diving into the world of Terraform state management, from keeping track of things on your own computer to storing them remotely in places like Amazon S3. Let's begin by explaining what local and remote state mean, explore the benefits of using Amazon S3, and then move on to hands-on examples of setting up Terraform to store its state remotely.
Understanding Terraform State:
Terraform state is like the memory of your infrastructure. It keeps track of the resources you've created and their current state. When you run terraform apply, Terraform uses this state to understand what needs to be created, updated, or destroyed to achieve your desired infrastructure configuration.
Local State vs. Remote State:
Local state is stored on your local machine in a file called terraform.tfstate. While convenient for small projects, it poses challenges for collaboration and consistency in team environments. Remote state, on the other hand, is stored in a central location accessible to multiple users, facilitating better collaboration, versioning, and security.
What is Amazon S3?
Amazon S3 (Simple Storage Service) is an object storage service offered by AWS. It provides highly scalable, durable, and secure storage for a wide variety of data types, including images, videos, documents, and application backups. S3 is designed to offer 99.999999999% (11 nines) durability of objects over a given year and is commonly used for data storage, backup, and archiving.
Why Use Amazon S3 as a Remote Backend?
Amazon S3 offers several advantages as a remote backend for Terraform state storage:
Scalability: S3 can scale to accommodate any amount of data, making it suitable for storing Terraform state files of all sizes.
Durability: S3 provides high durability for stored objects, ensuring that your Terraform state is safe and accessible even in the event of hardware failures or disasters.
Accessibility: S3 buckets can be accessed securely from anywhere with an internet connection, allowing for seamless collaboration among team members working in different locations.
Security: S3 offers robust access control mechanisms, allowing you to control who can access your Terraform state files and under what conditions.
Integration: S3 integrates seamlessly with other AWS services, making it easy to incorporate Terraform state storage into your existing AWS workflows.
Task 1: Provisioning an EC2 Instance Locally
Create a new directory for your Terraform project:
mkdir terraform-demo.
Navigate into the project directory:
cd terraform-demo.Create a new Terraform configuration file named
main.tfusing your preferred text editor.Add the following code to
main.tfto define an EC2 instance configuration:
provider "aws" {
  region = "us-east-2"
}

resource "aws_instance" "example" {
  ami           = "ami-0c55b159cbfafe1f0"
  instance_type = "t2.micro"
}

- Save the file and exit the text editor.
Task 2: Initializing Terraform and Creating Local State
Open a terminal and navigate to your project directory if you're not already there.
Initialize Terraform in the project directory:
terraform init.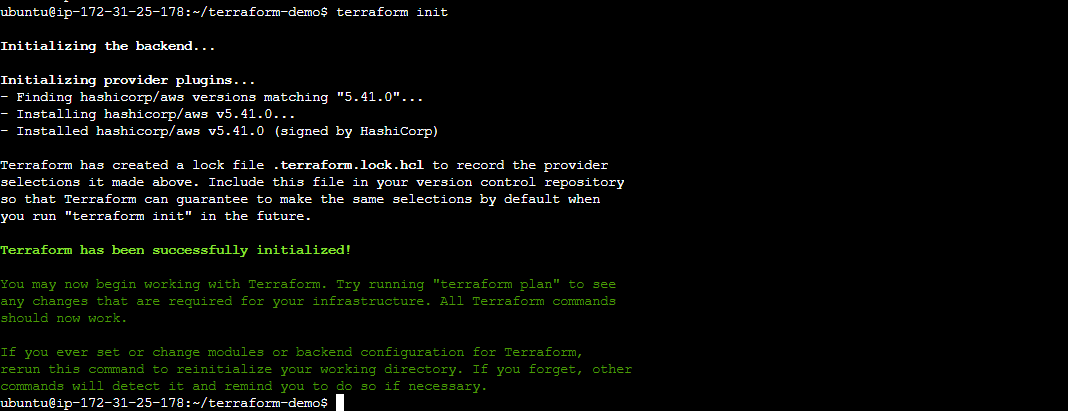
Apply the Terraform configuration to create the EC2 instance:
terraform apply.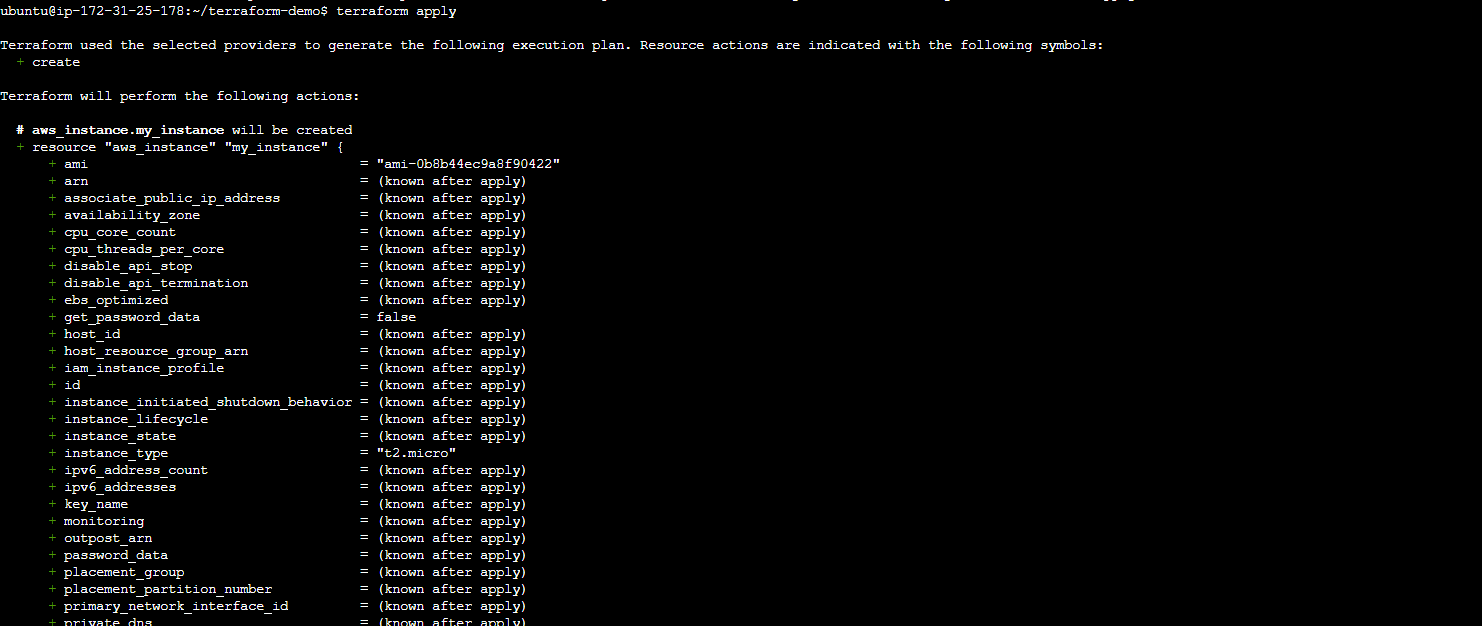
Confirm the resource creation by typing
yeswhen prompted.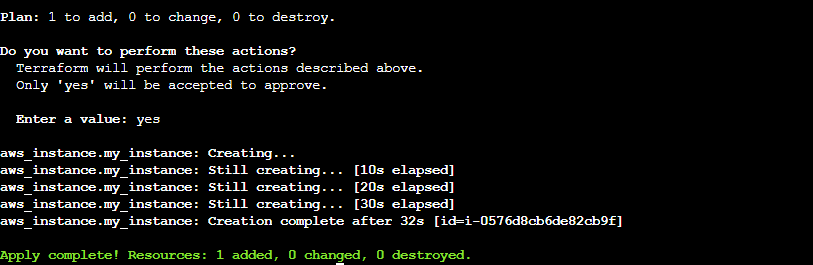
Task 3: Inspecting Local State withterraform state
After the
applycommand completes, runterraform state listto see a list of resources managed by Terraform.
Use
terraform state show <resource_type>.<resource_name>to view detailed information about the created EC2 instance (e.g.,terraform state show aws_instance.example).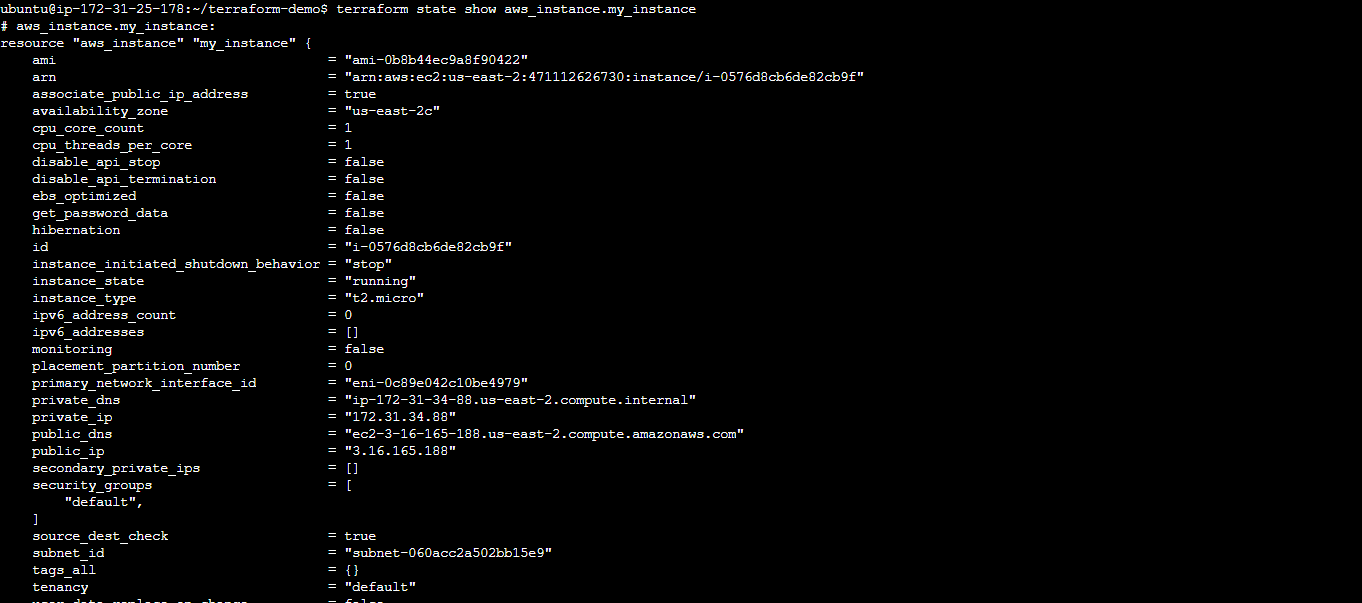
Task 4: Configuring Remote State with Amazon S3
To configure Terraform to use Amazon S3 as a remote backend, follow these steps:
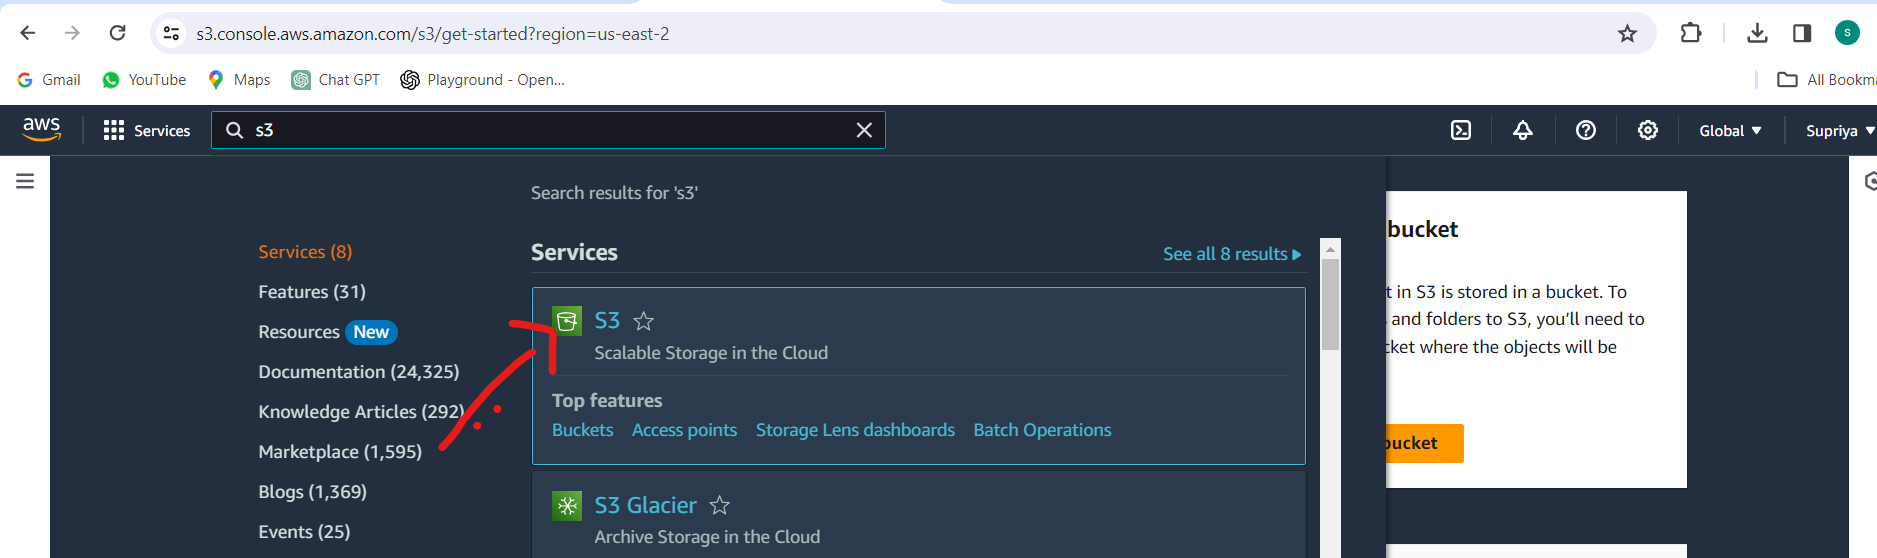
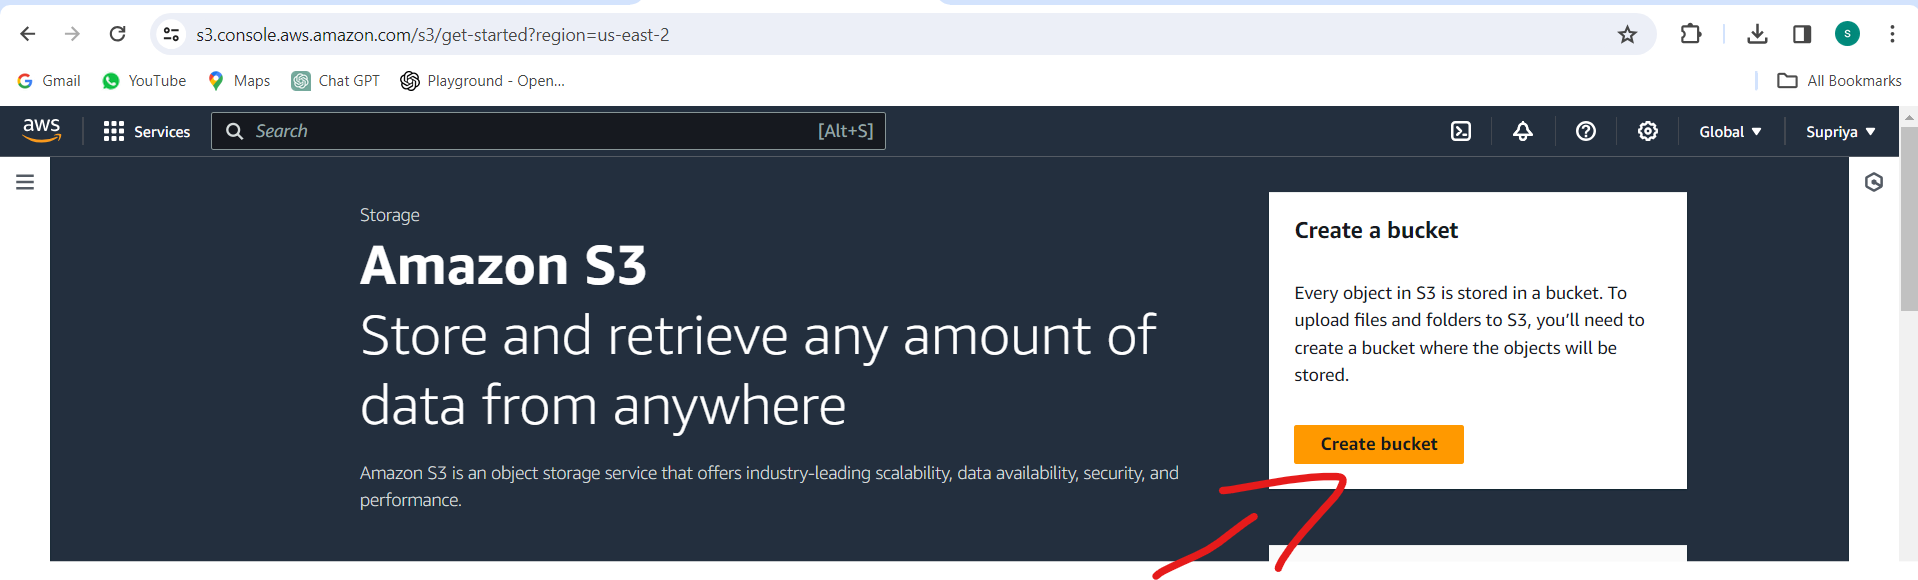
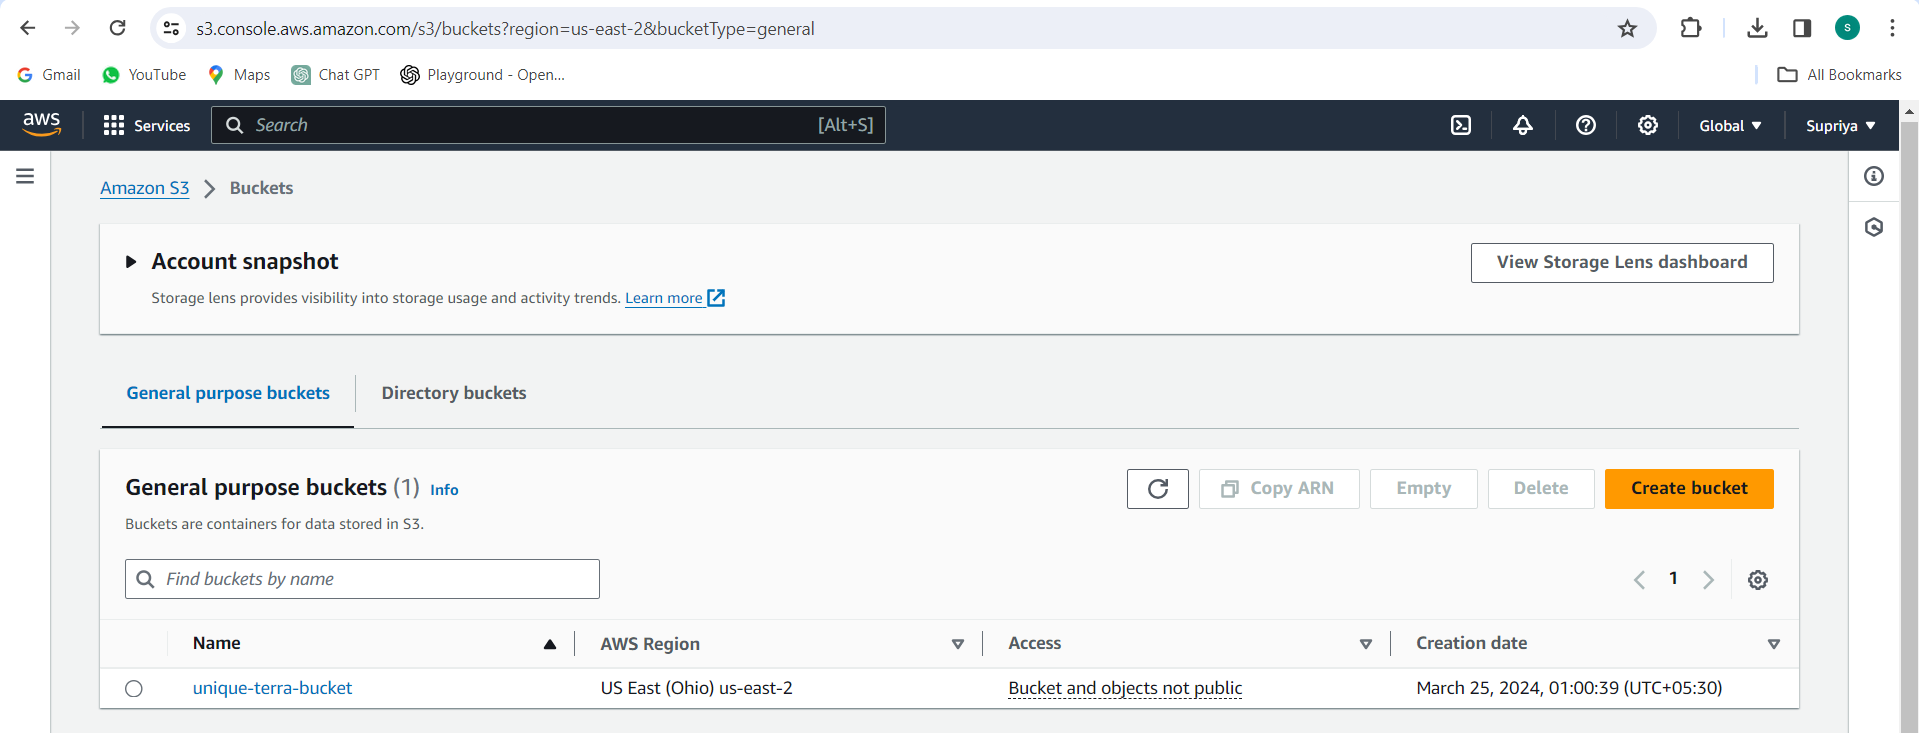
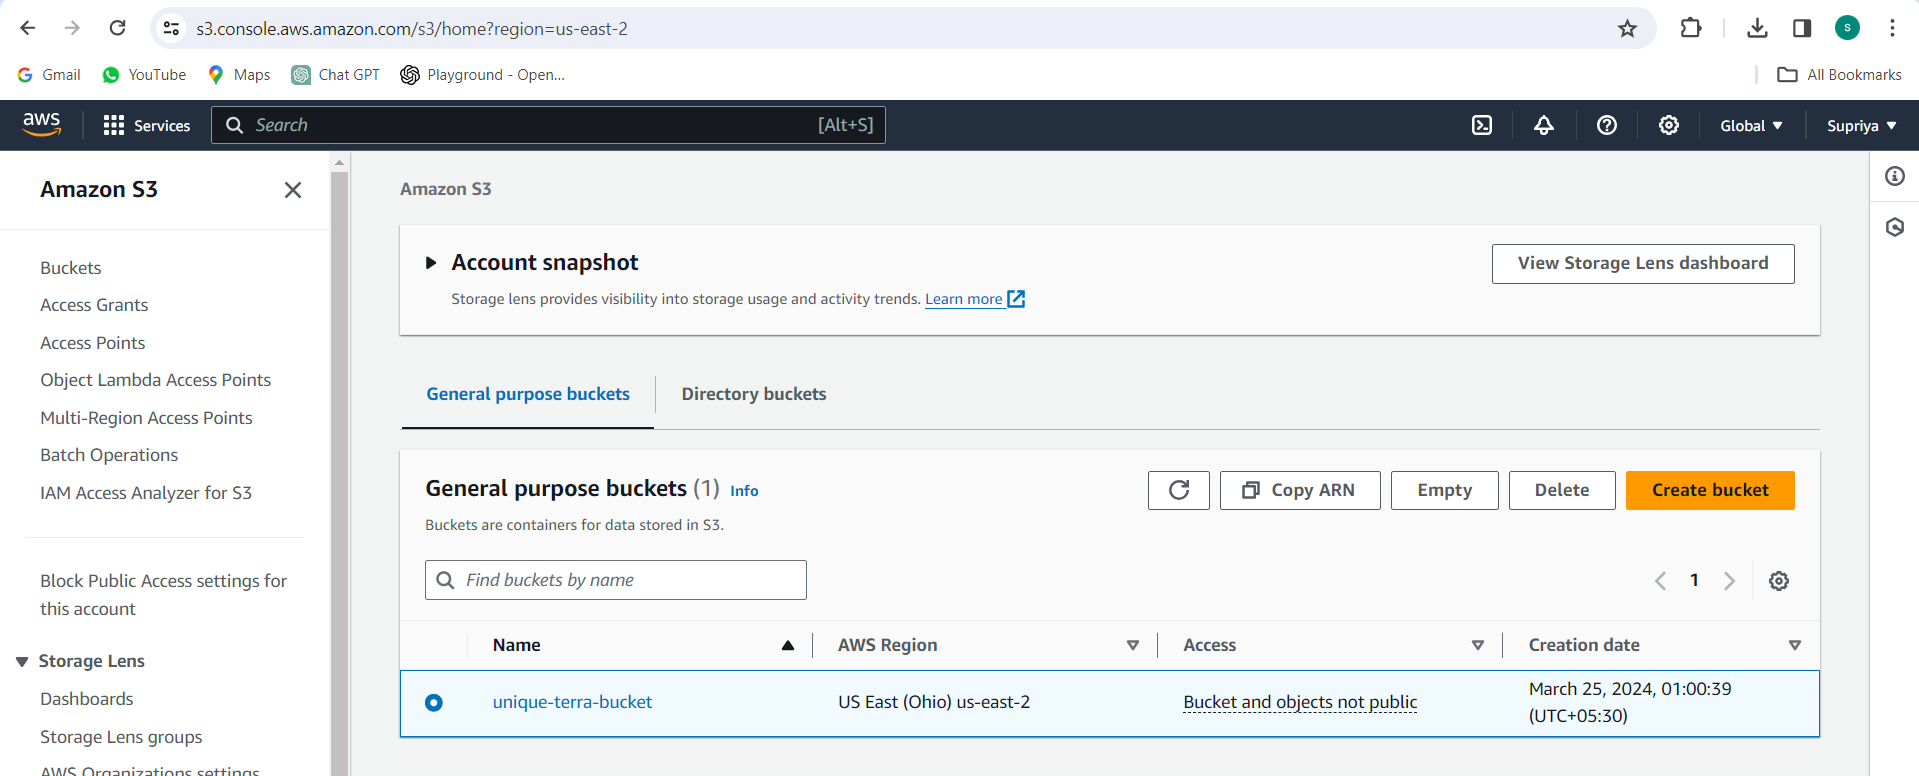
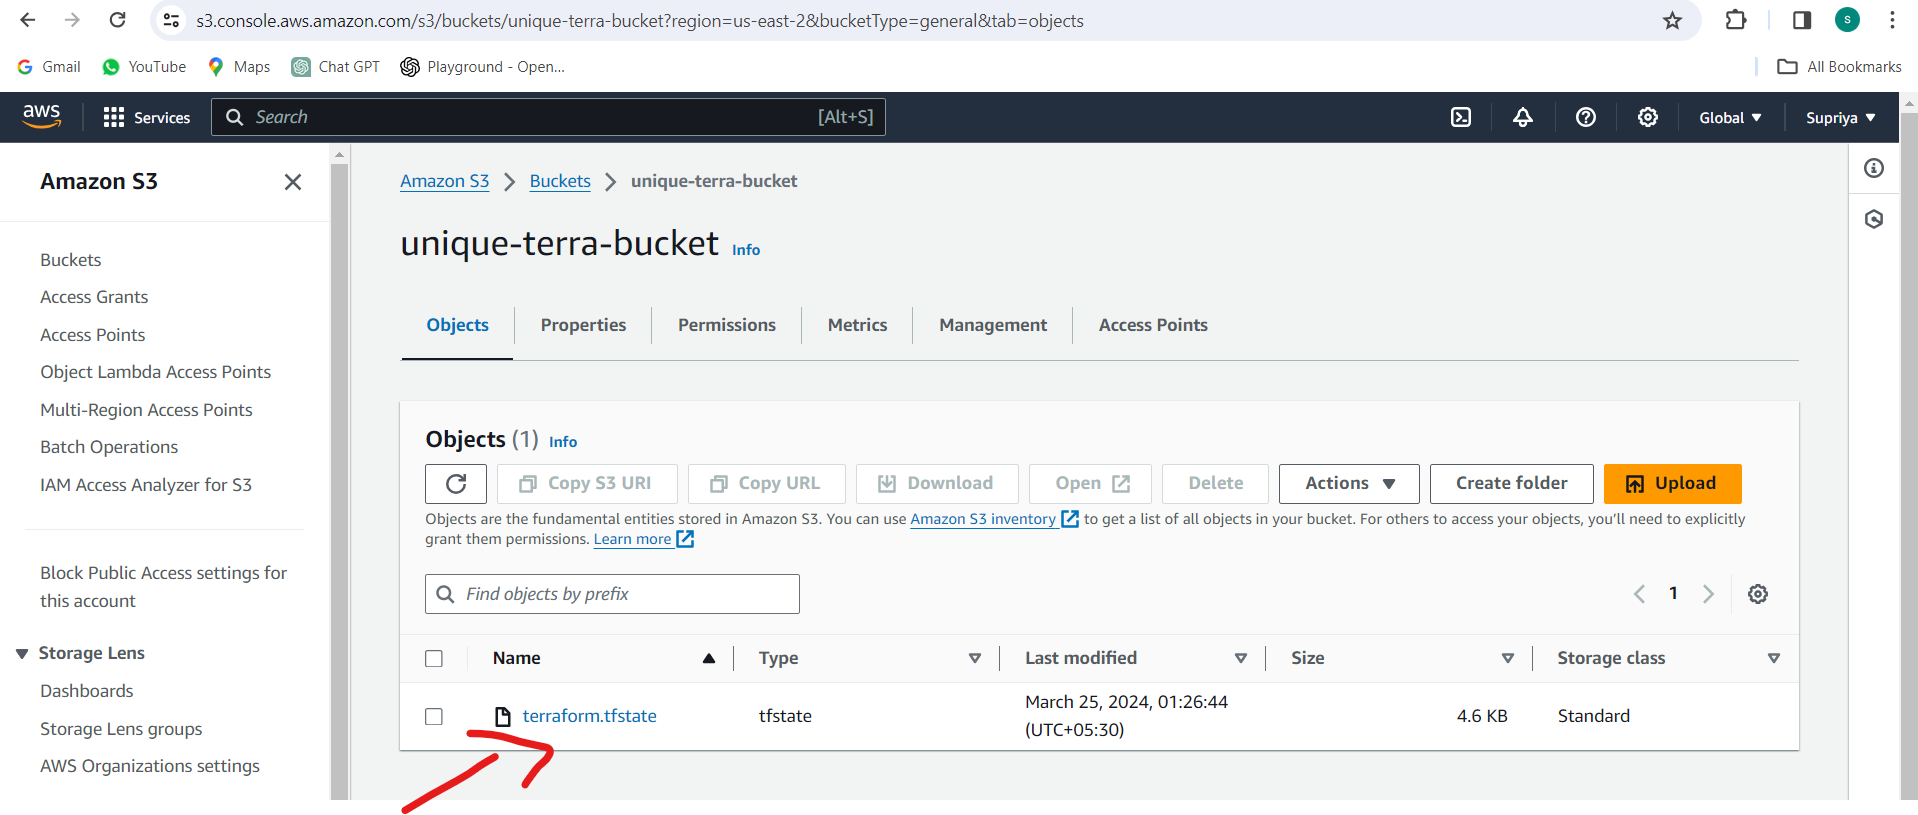
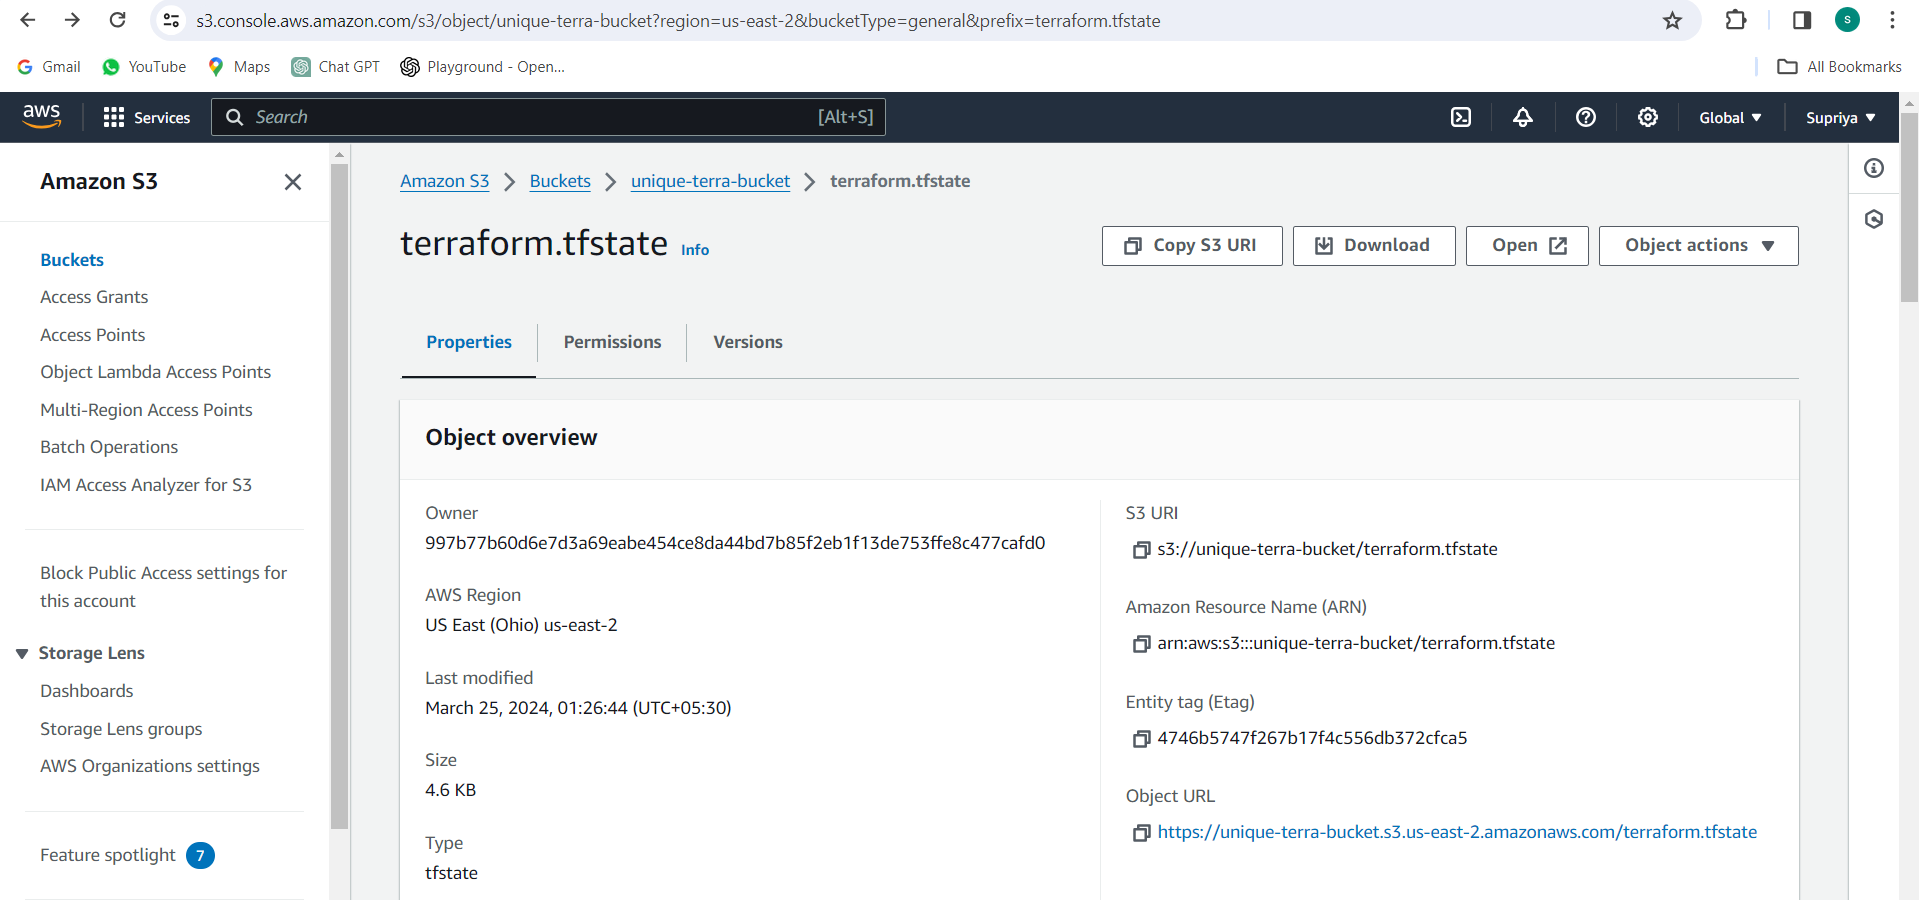
Step 1: Create an S3 Bucket for Remote State Management:
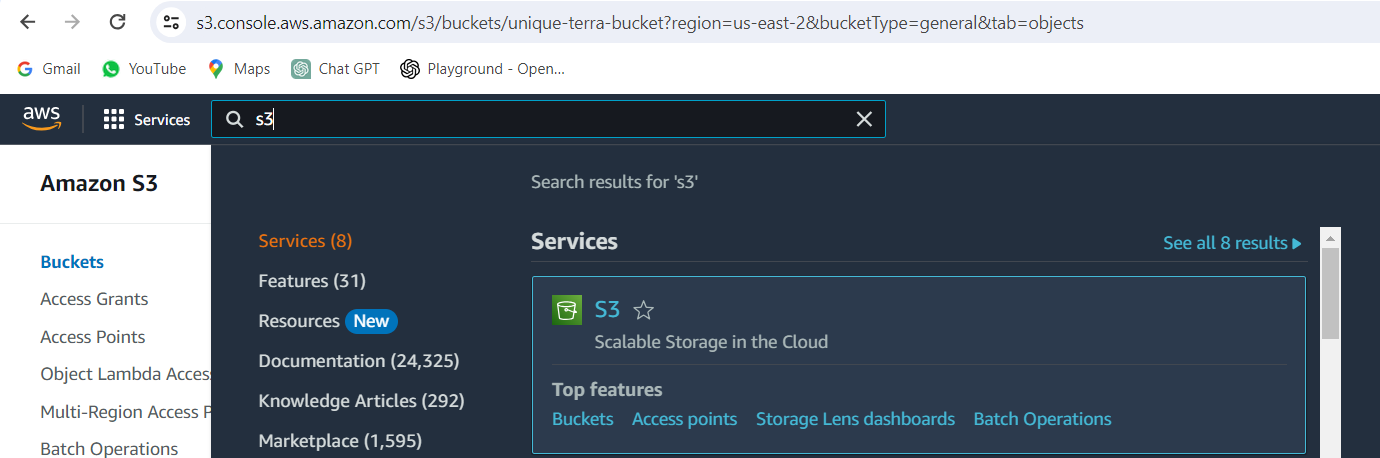
Navigate to the S3 Management Console in your AWS account.
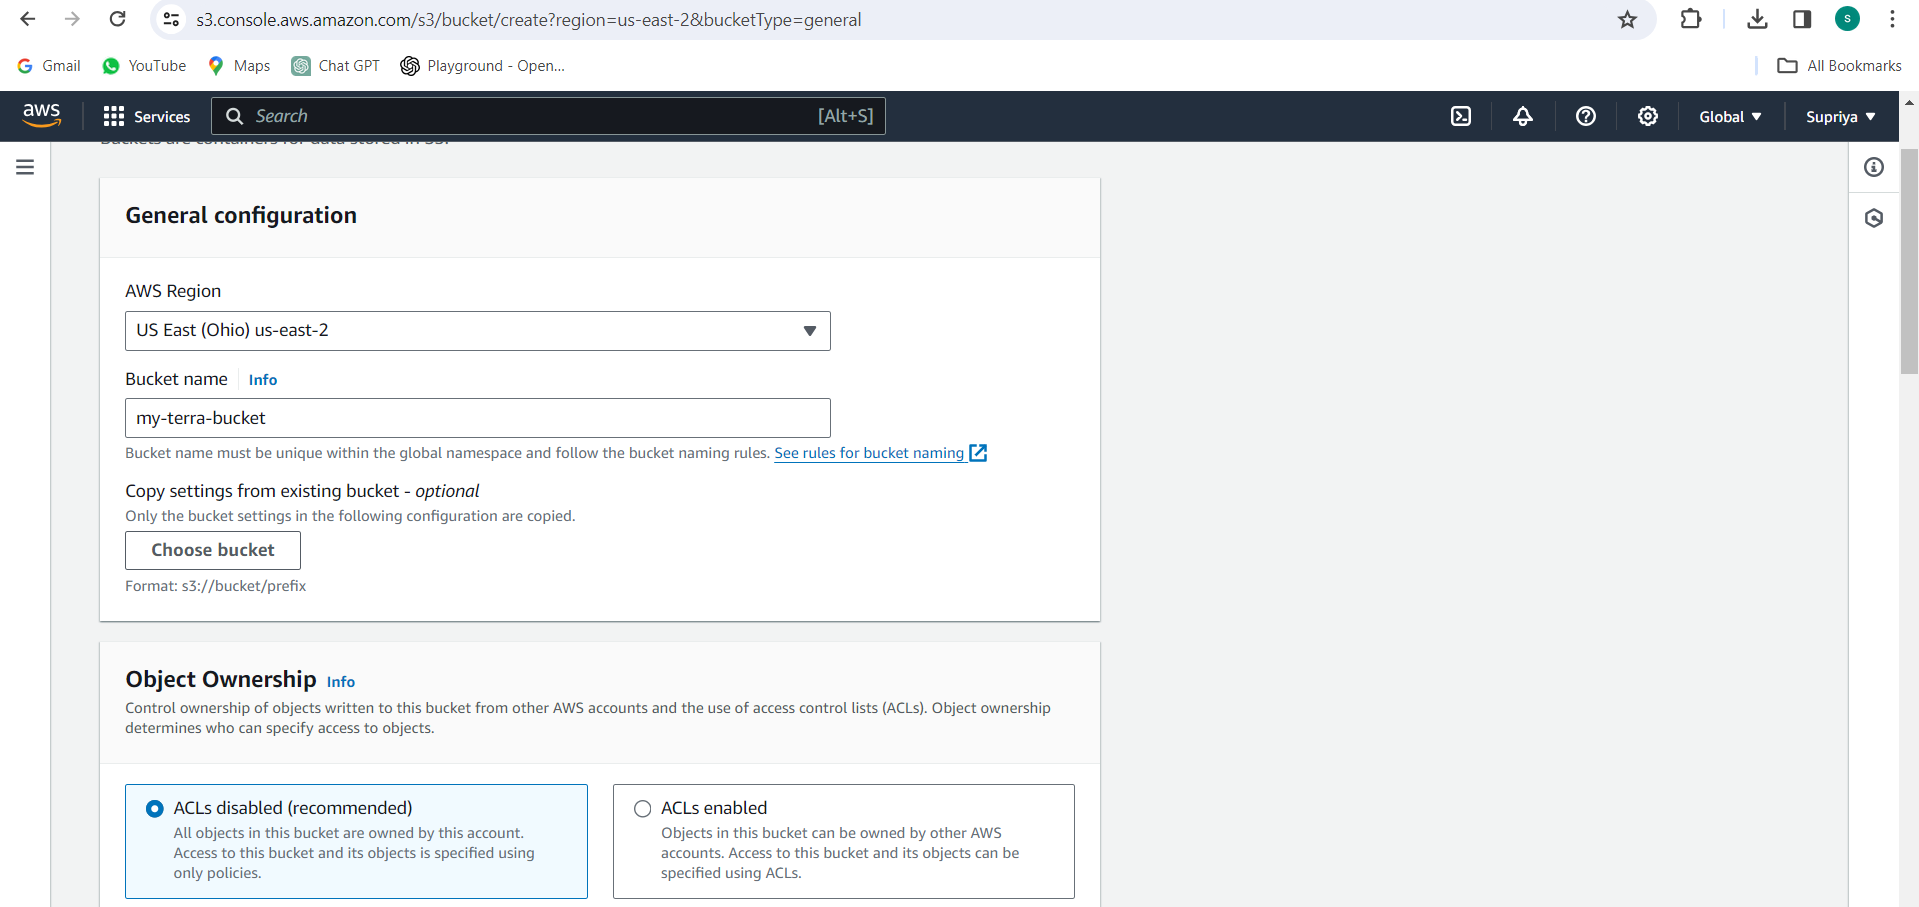
Click on "Create bucket" and enter a unique name for your bucket.
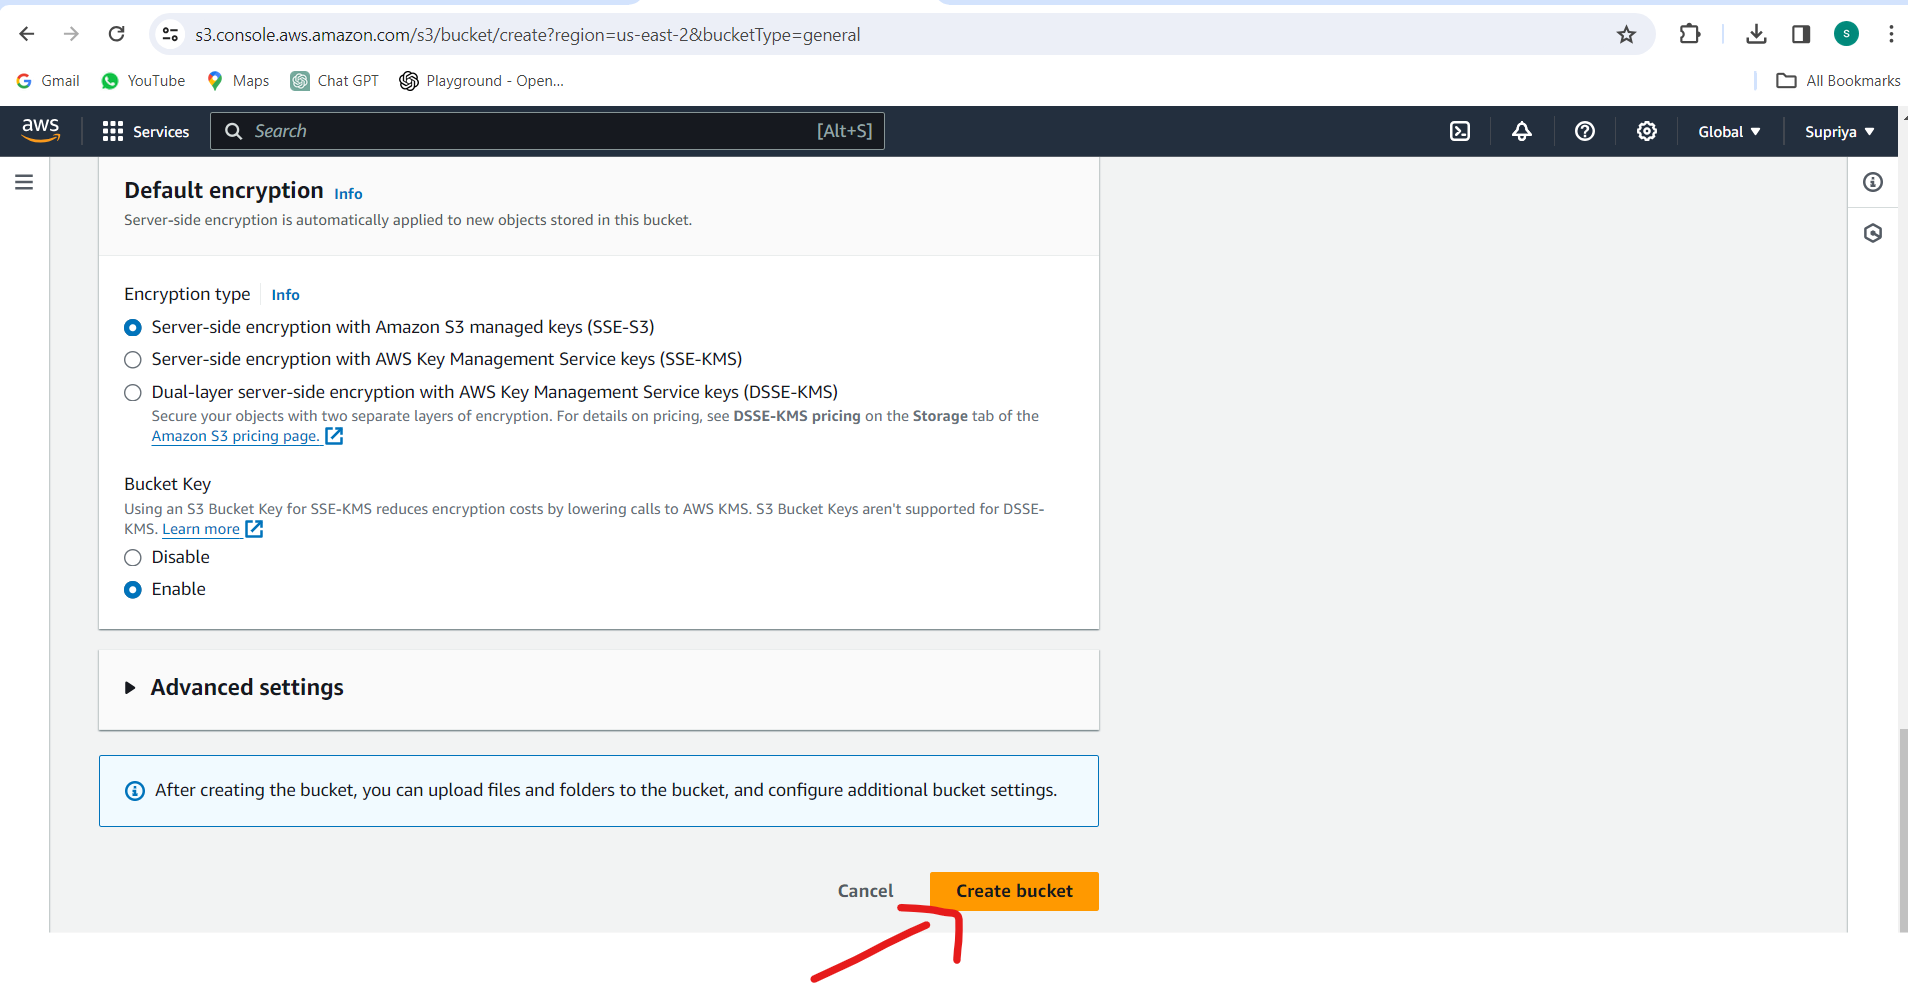
Choose the region for your bucket and configure any additional settings as needed.
Click on "Create bucket" to create the S3 bucket.
Step 2: Create an IAM User and Attach Policy:
Navigate to the IAM Management Console in your AWS account.
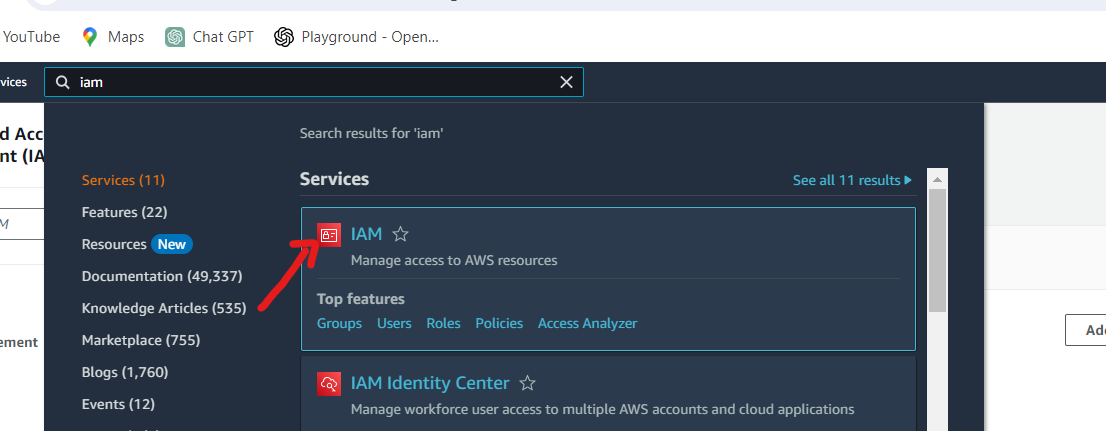
Click on "Users" and then "Add user".
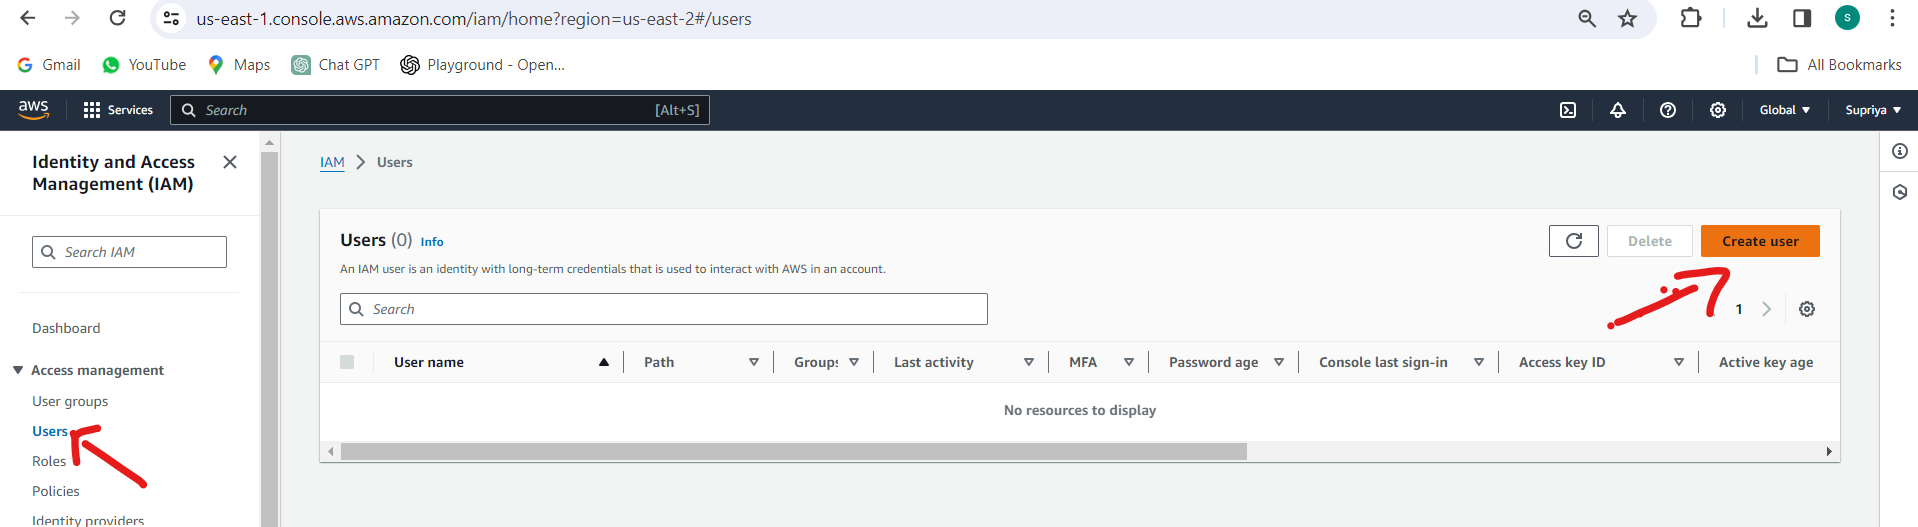
Enter a username for the new IAM user and select "Programmatic access".
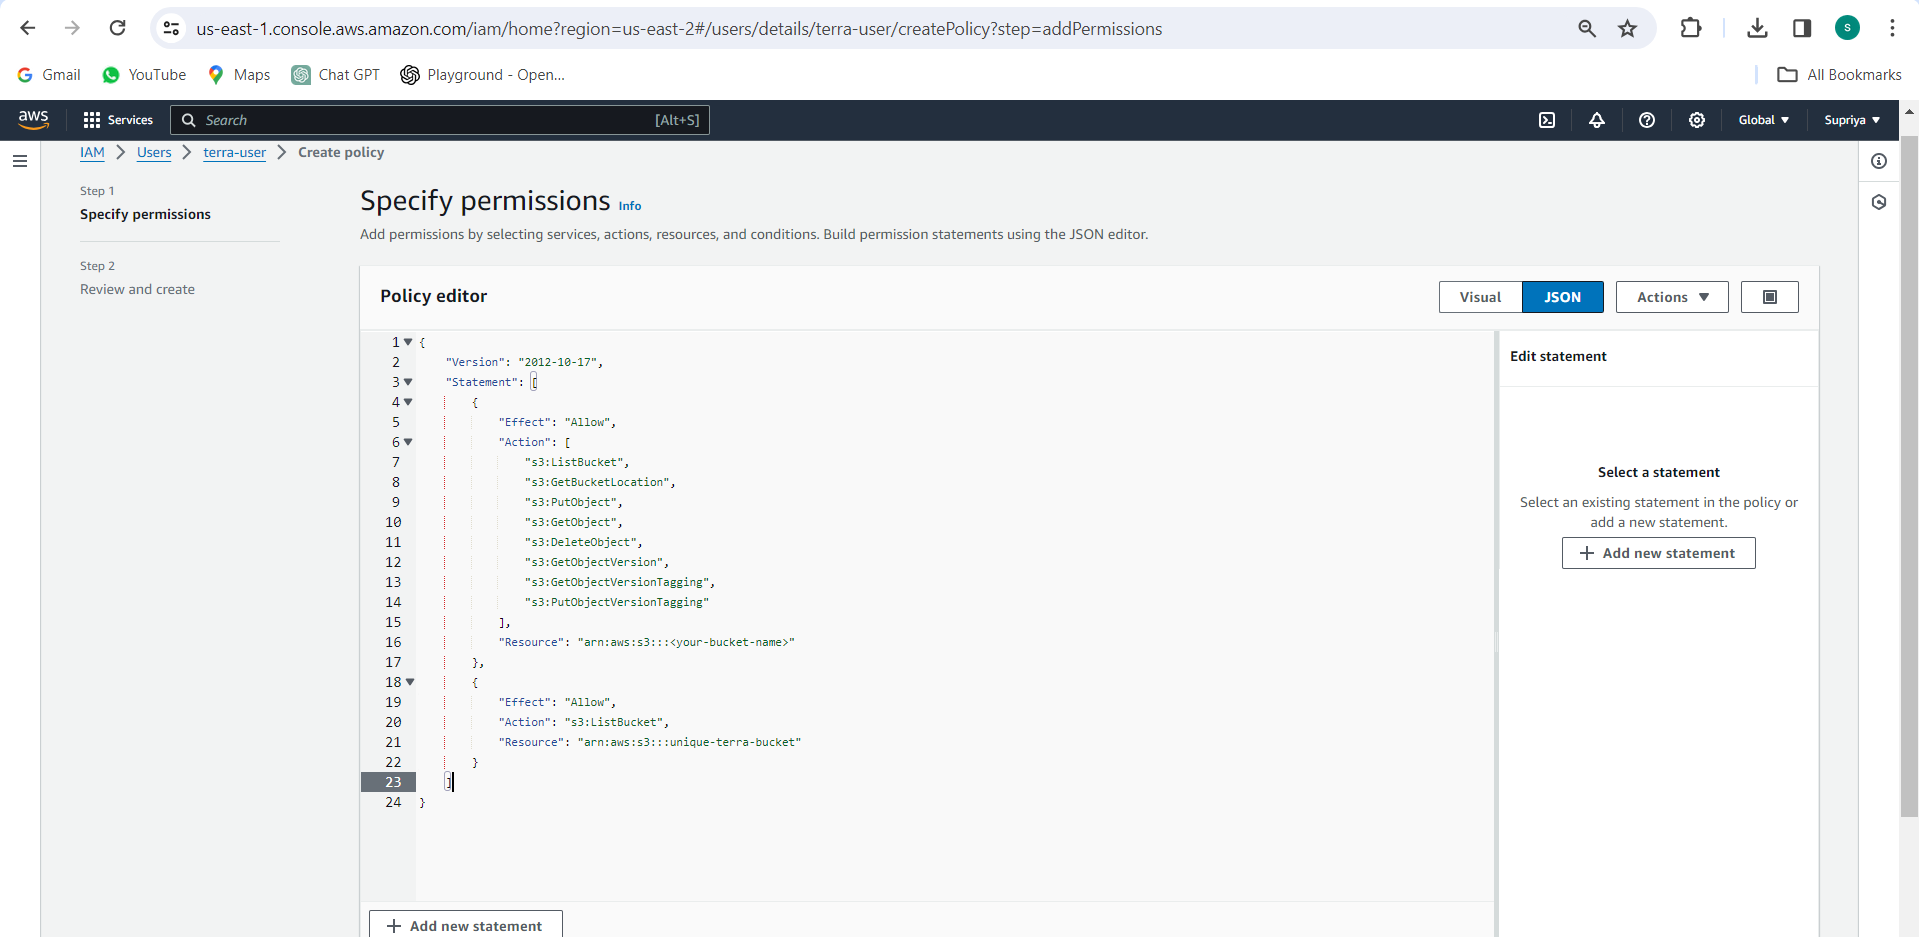
Proceed to the "Permissions" step and attach a policy with the necessary permissions for accessing and managing the S3 bucket. Here's an example policy:
{
    "Version": "2012-10-17",
    "Statement": [
        {
            "Effect": "Allow",
            "Action": [
                "s3:ListBucket",
                "s3:GetBucketLocation",
                "s3:PutObject",
                "s3:GetObject",
                "s3:DeleteObject",
                "s3:GetObjectVersion",
                "s3:GetObjectVersionTagging",
                "s3:PutObjectVersionTagging"
            ],
            "Resource": "arn:aws:s3:::<your-bucket-name>"
        },
        {
            "Effect": "Allow",
            "Action": "s3:ListBucket",
            "Resource": "arn:aws:s3:::<your-bucket-name>"
        }
    ]
}
Replace <your-bucket-name> with the name of your S3 bucket.
Step 3: Attach IAM User to S3 Bucket:
Navigate back to the S3 Management Console.
Select the S3 bucket you created for Terraform state storage.
Go to the "Permissions" tab and click on "Bucket Policy".
Add a policy that grants access to the IAM user created in Step 2. Here's an example policy:
{
    "Version": "2012-10-17",
    "Statement": [
        {
            "Effect": "Allow",
            "Principal": {
                "AWS": "arn:aws:iam::<AWS-account-ID>:user/<IAM-username>"
            },
            "Action": [
                "s3:ListBucket",
                "s3:GetBucketLocation",
                "s3:PutObject",
                "s3:GetObject",
                "s3:DeleteObject",
                "s3:GetObjectVersion",
                "s3:GetObjectVersionTagging",
                "s3:PutObjectVersionTagging"
            ],
            "Resource": [
                "arn:aws:s3:::<your-bucket-name>",
                "arn:aws:s3:::<your-bucket-name>/*"
            ]
        }
    ]
}
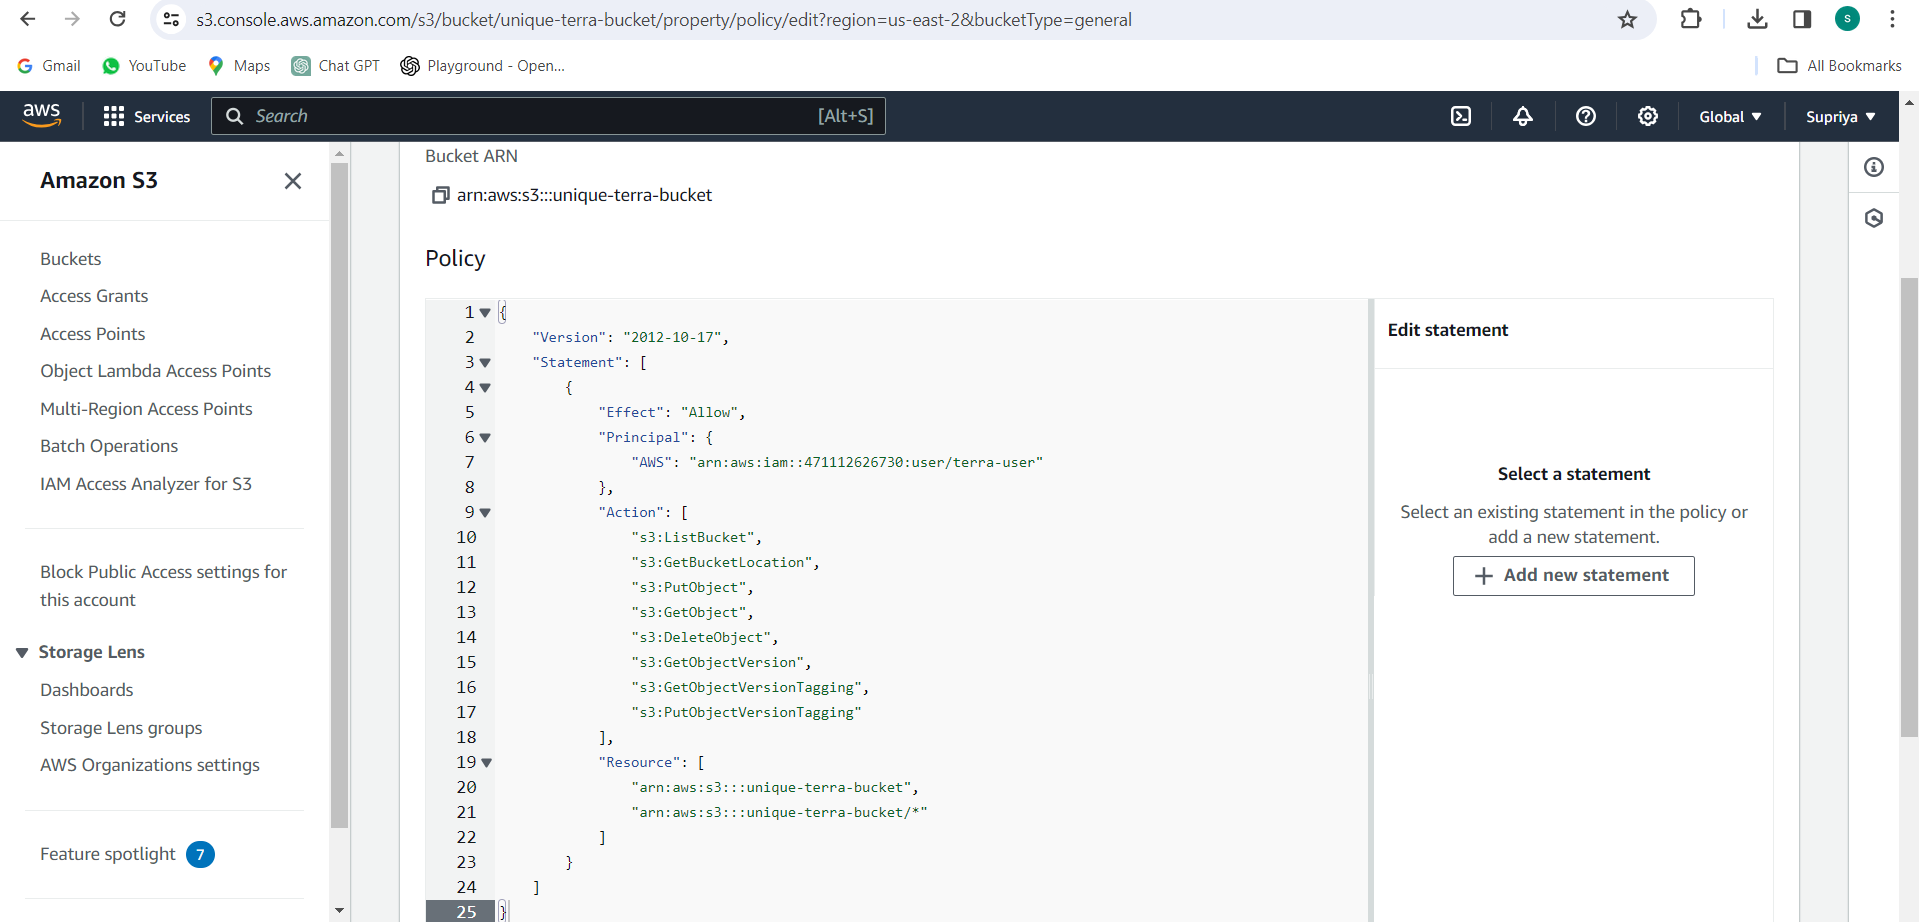
Replace <AWS-account-ID> with your AWS account ID, <IAM-username> with the name of the IAM user you created, and <your-bucket-name> with the name of your S3 bucket.
Example:
Now that you've created the IAM user, attached the necessary policy, and granted access to the S3 bucket, you can proceed to configure Terraform to use Amazon S3 as the remote backend.
- Modify your
main.tffile to include the S3 backend configuration:
terraform {
  backend "s3" {
    bucket         = "<your-bucket-name>"
    key            = "terraform.tfstate"
    region         = "us-east-2"
  }
}
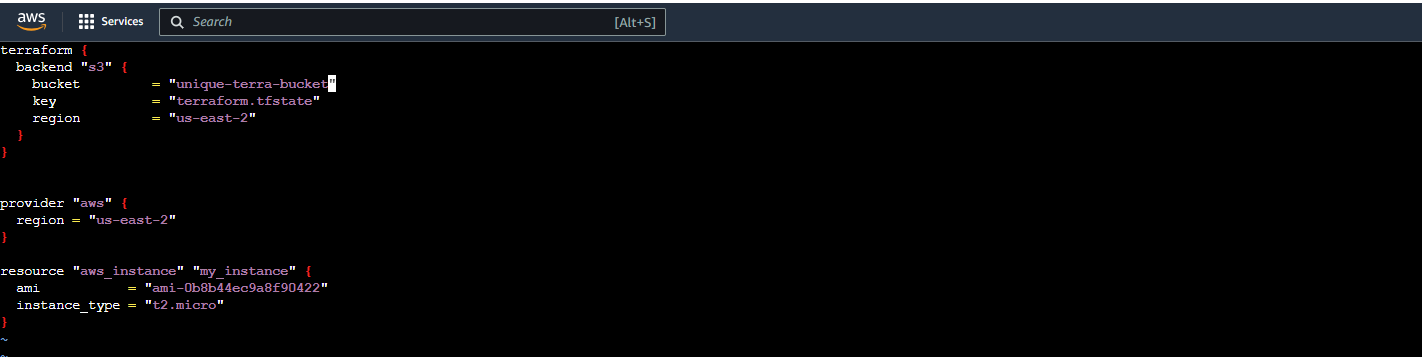
Replace
<your-bucket-name>with the name of the S3 bucket you created.Save the changes to
main.tf.
Task 5: Reinitializing Terraform for Remote State
Back in your terminal, run
terraform initagain.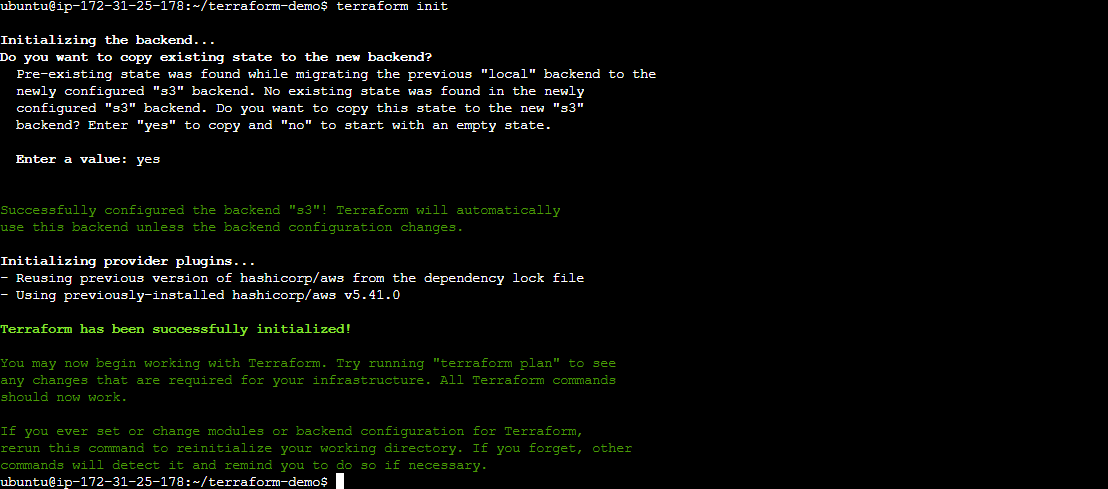
Terraform will detect the changes in the backend configuration and prompt you to migrate state to the S3 bucket. Confirm the migration by typing
yes.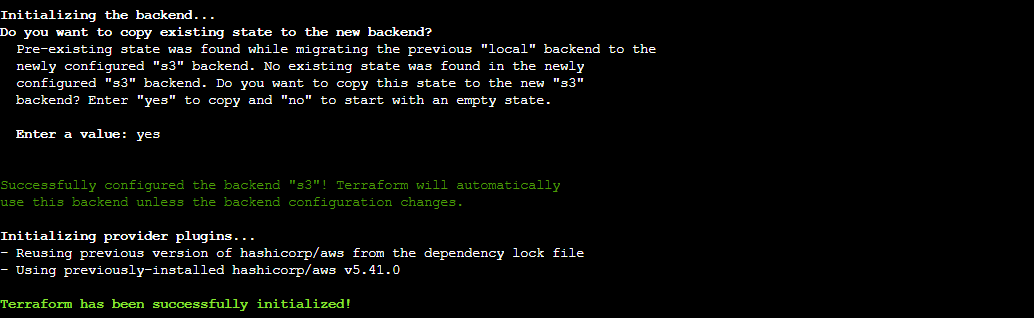
After the initialization completes, verify that Terraform is now configured to use remote state storage in Amazon S3.
Conclusion:
By leveraging Amazon S3 as a remote backend for Terraform state storage, you enhance collaboration and ensure the security and reliability of your infrastructure management workflows. With a solid understanding of Terraform state concepts and practical examples, you're ready to streamline your infrastructure provisioning with confidence.


