This is #90DaysofDevops challenge under the guidance of Shubham Londhe sir.
Introduction
In the world of DevOps and Continuous Integration/Continuous Deployment (CI/CD), grasping the concept of Jenkins' Declarative Pipeline Syntax is crucial. This syntax serves as a blueprint for organizing the sequence of tasks or jobs that make up a pipeline, allowing for a smooth and structured software development journey.
What is a Pipeline?
Think of a pipeline as a series of connected tasks or jobs that run one after the other, following a predefined order. It's like an assembly line for your software, ensuring each step is completed in the right sequence to deliver a functional product.
Declarative vs. Scripted:
Jenkins provides two methods for creating pipelines: Declarative and Scripted.
Declarative: This is the newer and straightforward approach. Think of it as having a clear, step-by-step guide to follow.
Scripted: This is the older way. It offers more flexibility but can be a bit like figuring out a puzzle.
Why Having a Pipeline is Important:
A Jenkins Pipeline is encapsulated within a special text file called a Jenkinsfile. This file lives alongside your project's source code and allows you to manage your CD pipeline just like any other piece of code. It's like having a manual that guides the automated process of building, testing, and deploying your software.
Benefits of Using Jenkinsfile:
Automated Pipeline Creation: Jenkinsfile automates the creation of pipeline build processes for all branches and pull requests. It's like having a magic wand that sets up your workflow effortlessly.
Streamlined Code Review: By integrating the pipeline into your source code repository, you can review and refine it alongside your main codebase. It's like having your development and deployment strategies in sync, making collaboration smoother and more efficient.
Understanding Pipeline Syntax:
pipeline {
    agent any
    stages {
        stage('Build') {
            steps {
                // Build steps go here
            }
        }
        stage('Test') {
            steps {
                // Test steps go here
            }
        }
        stage('Deploy') {
            steps {
                // Deployment steps go here
            }
        }
    }
}
TASK 01
Step 1: Create a New Pipeline Job
Launch an EC2 instance and install Jenkins.

Access Jenkins using the EC2 instance's public IP and port 8080.

Open Jenkins Dashboard, click "New Item," name it, choose "Pipeline," and proceed.


Step 2: Configure Your Pipeline
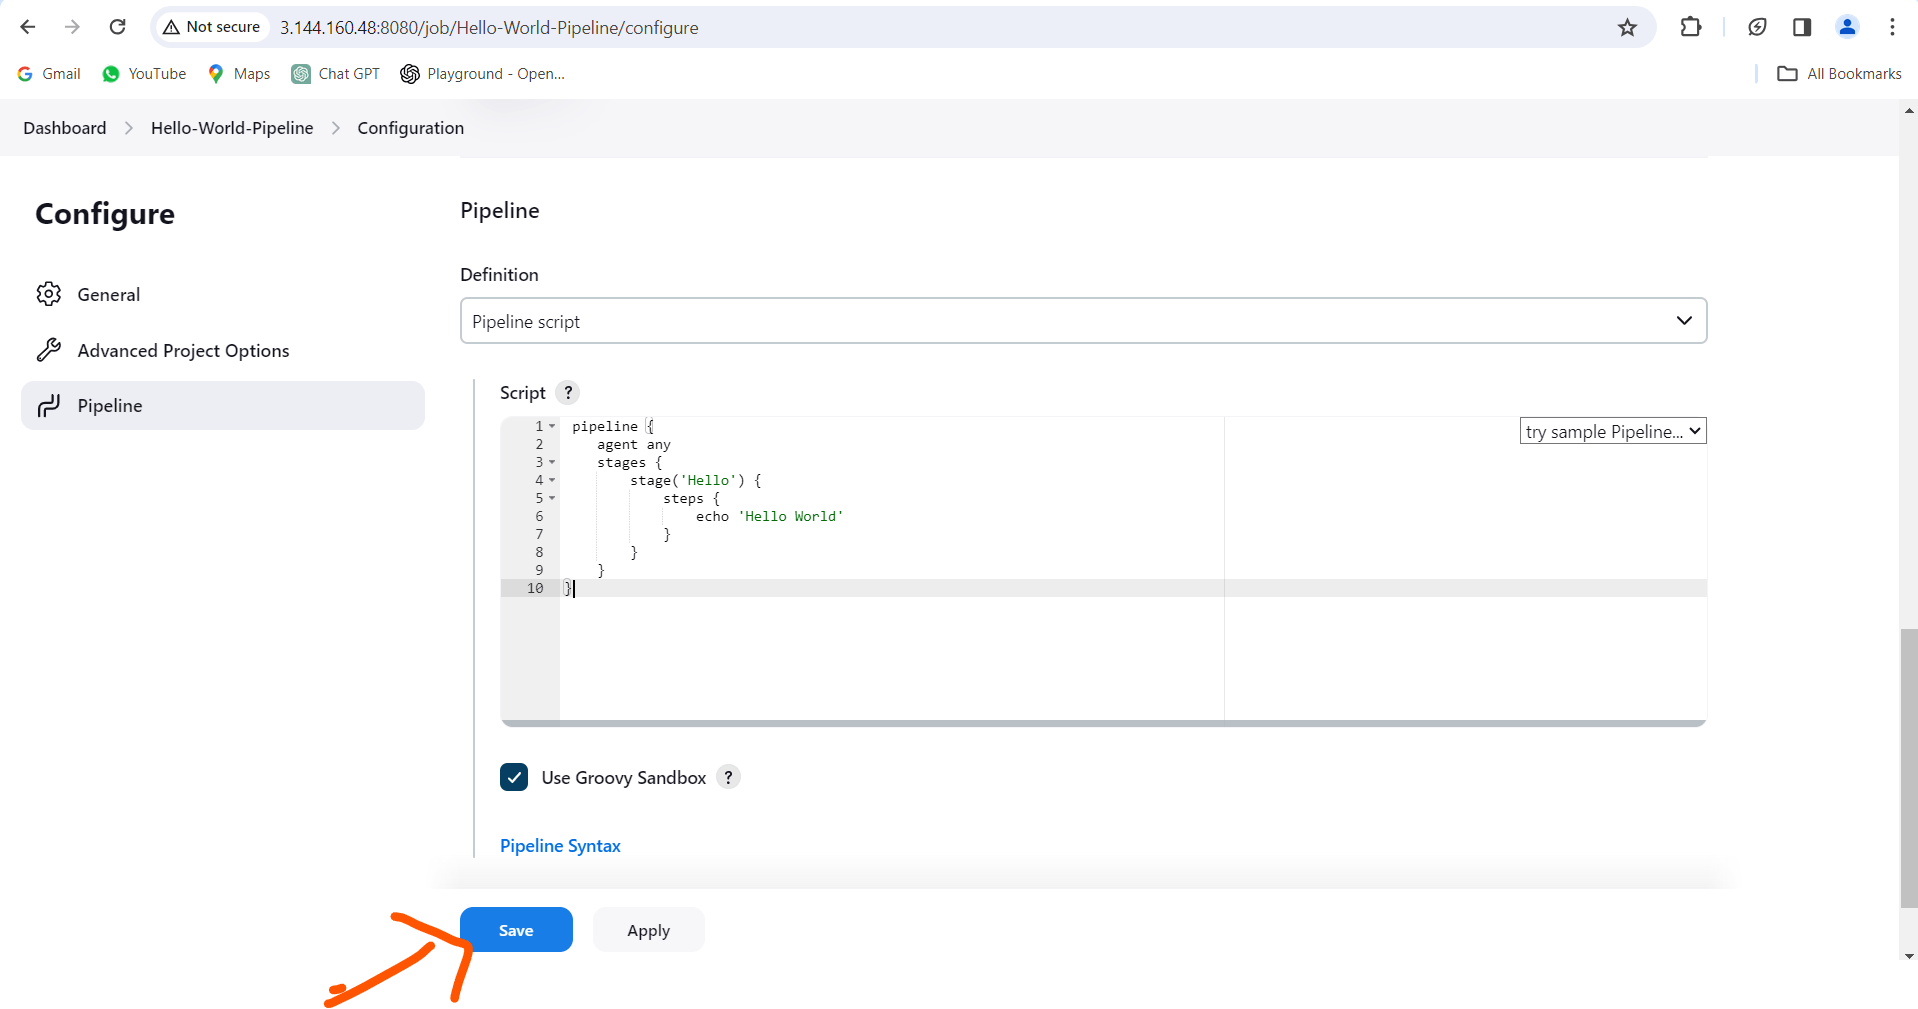
In Project Configuration, under "Pipeline," choose "Pipeline script" as the definition.
Write a simple script for a "Hello World" example using the Declarative pipeline.

Pipeline Script:
 pipeline {
    agent any
    stages {
        stage('Hello') {
            steps {
                echo 'Hello World'
            }
        }
    }
}
Script Breakdown:
Pipeline: The starting block for Declarative pipeline.Agent: Specifies where the build job should run (in this case, anywhere).Stages/Stage: Contains executable stage blocks (mandatory). Here, named "Hello."Steps: Actual operations in Jenkins. Printing "Hello World" in this case.
Step 3: Run Your Pipeline
Save the Pipeline configuration.
Click "Build Now" to manually start the build process.

After completion, check the "Console Output" for "Hello World."

Explore Results:
View the multi-stage view by clicking "Full Stage View" on the project main page.

By embracing the Jenkins Declarative Pipeline and leveraging the power of Jenkinsfile, you're not just automating tasks, you're revolutionizing your software delivery process, making it more efficient, transparent, and collaborative.
