Day 24, 25: Deploying Python Flask App on AWS EC2 with Jenkins CI/CD Pipeline
This is #90DaysofDevops challenge under the guidance of Shubham Londhe sir.
Introduction
In Days 24 and 25 of our DevOps adventure, we're diving into deploying a Python Flask application on an AWS EC2 instance while setting up a robust CI/CD pipeline using Jenkins.
Tools Used:
AWS EC2
GitHub
Docker
Jenkins
Continuous Integration (CI):
What is CI?
- Continuous Integration is a development practice where code changes from multiple contributors are automatically merged into a shared repository several times a day.
How Does it Work?
Developers regularly push their code changes to a shared repository.
An automated build process then kicks in, compiling the code and checking for errors.
Automated tests are run to ensure that the new code changes do not break existing functionality.
Why is it Important?
Helps identify and fix integration issues early in the development process.
Ensures that the codebase is always in a working state.
Continuous Deployment (CD):
What is CD?
- Continuous Deployment is an extension of CI where code changes, after being integrated and tested, are automatically deployed to a production environment.
How Does it Work?
Once code changes pass the CI phase, they can automatically move to the deployment phase.
Automated deployment scripts deploy the changes to the production environment without manual intervention.
Why is it Important?
Accelerates the release of new features and bug fixes.
Reduces the risk of human error in the deployment process.
CI/CD Pipeline:
What is a CI/CD Pipeline?
- A CI/CD pipeline is a series of automated steps that code changes go through, starting from integration, testing, and ending with deployment.
How Does it Work?
Integration Phase: Code changes are automatically integrated into a shared repository.
Build Phase: The code is compiled, and an executable or deployable artifact is created.
Test Phase: Automated tests are run to ensure code quality and functionality.
Deployment Phase: If all tests pass, the code changes are automatically deployed to a production environment.
Why is it Important?
Ensures a systematic and automated approach to software development.
Reduces manual errors and accelerates the delivery of reliable software.
Task 01: Setting Up the Environment
Set Up AWS EC2 Instance:
Launch an EC2 instance on AWS with suitable specifications for hosting your Python Flask application.

Install Jenkins on EC2:
Follow the official documentation to install Jenkins on your EC2 instance.
Ensure that Jenkins is accessible on port 8080.

Generate SSH Keys:
Create SSH keys on your EC2 instance using the command
ssh-keygen.
Add the public key to your GitHub repository settings to establish a connection between Jenkins and GitHub.
Go to "Settings" > "SSH and GPG keys" > "New SSH key."

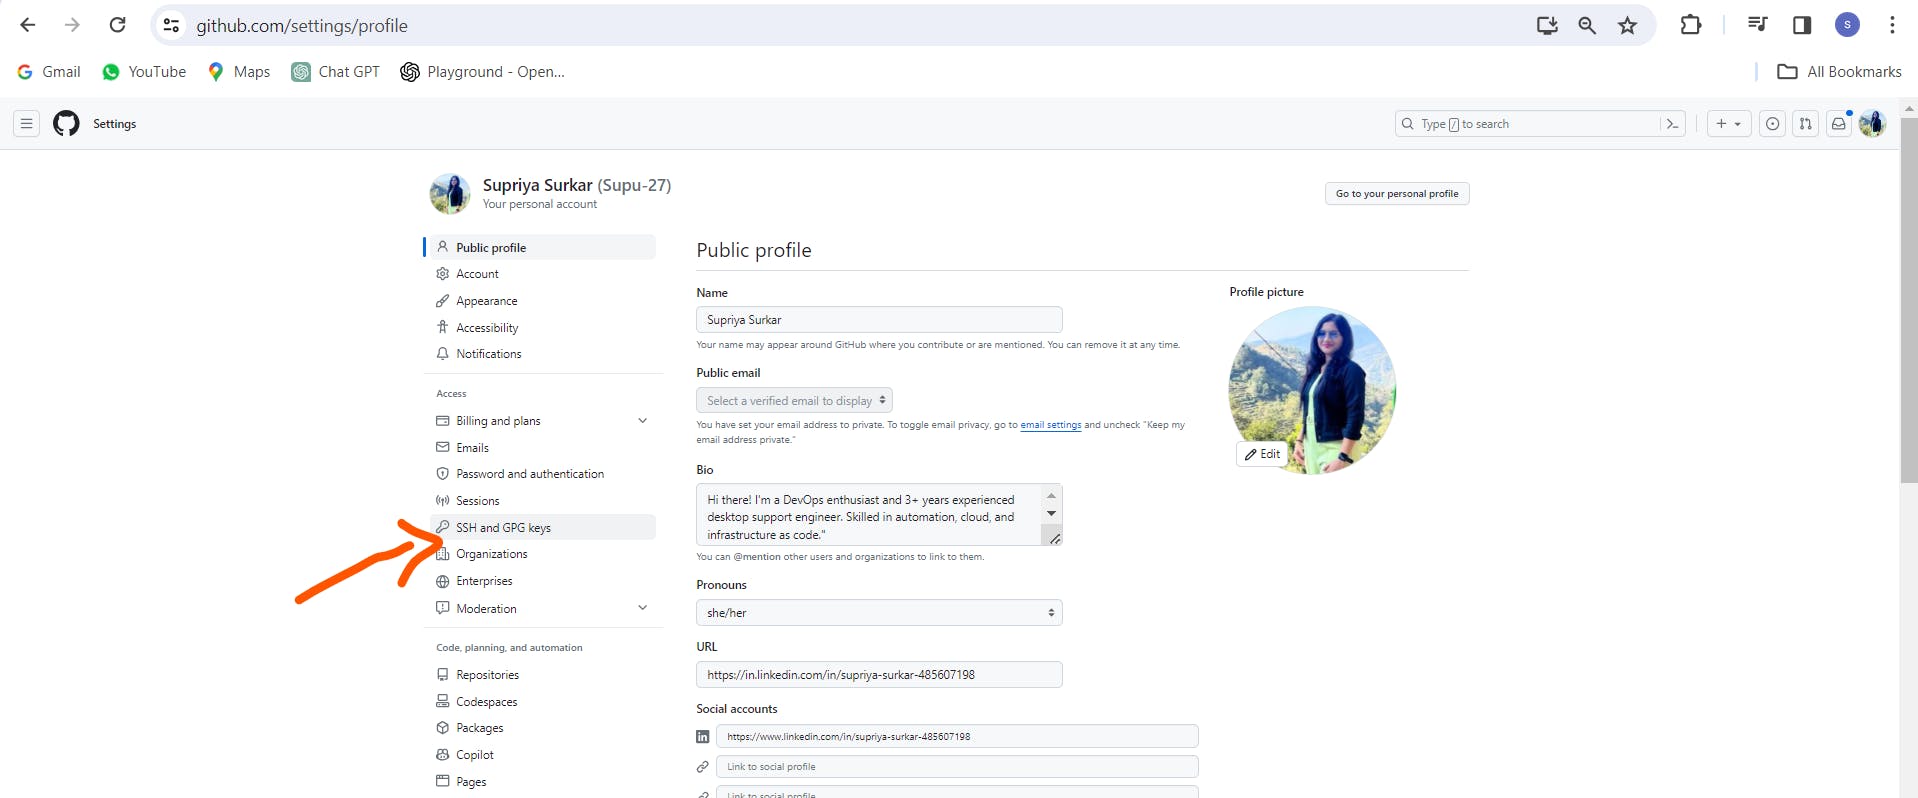
Paste your public key into the "Key" field and provide a descriptive title.
Click on "Add SSH key" to save the key.

Configure Jenkins:
Access Jenkins dashboard and navigate to create a new item.

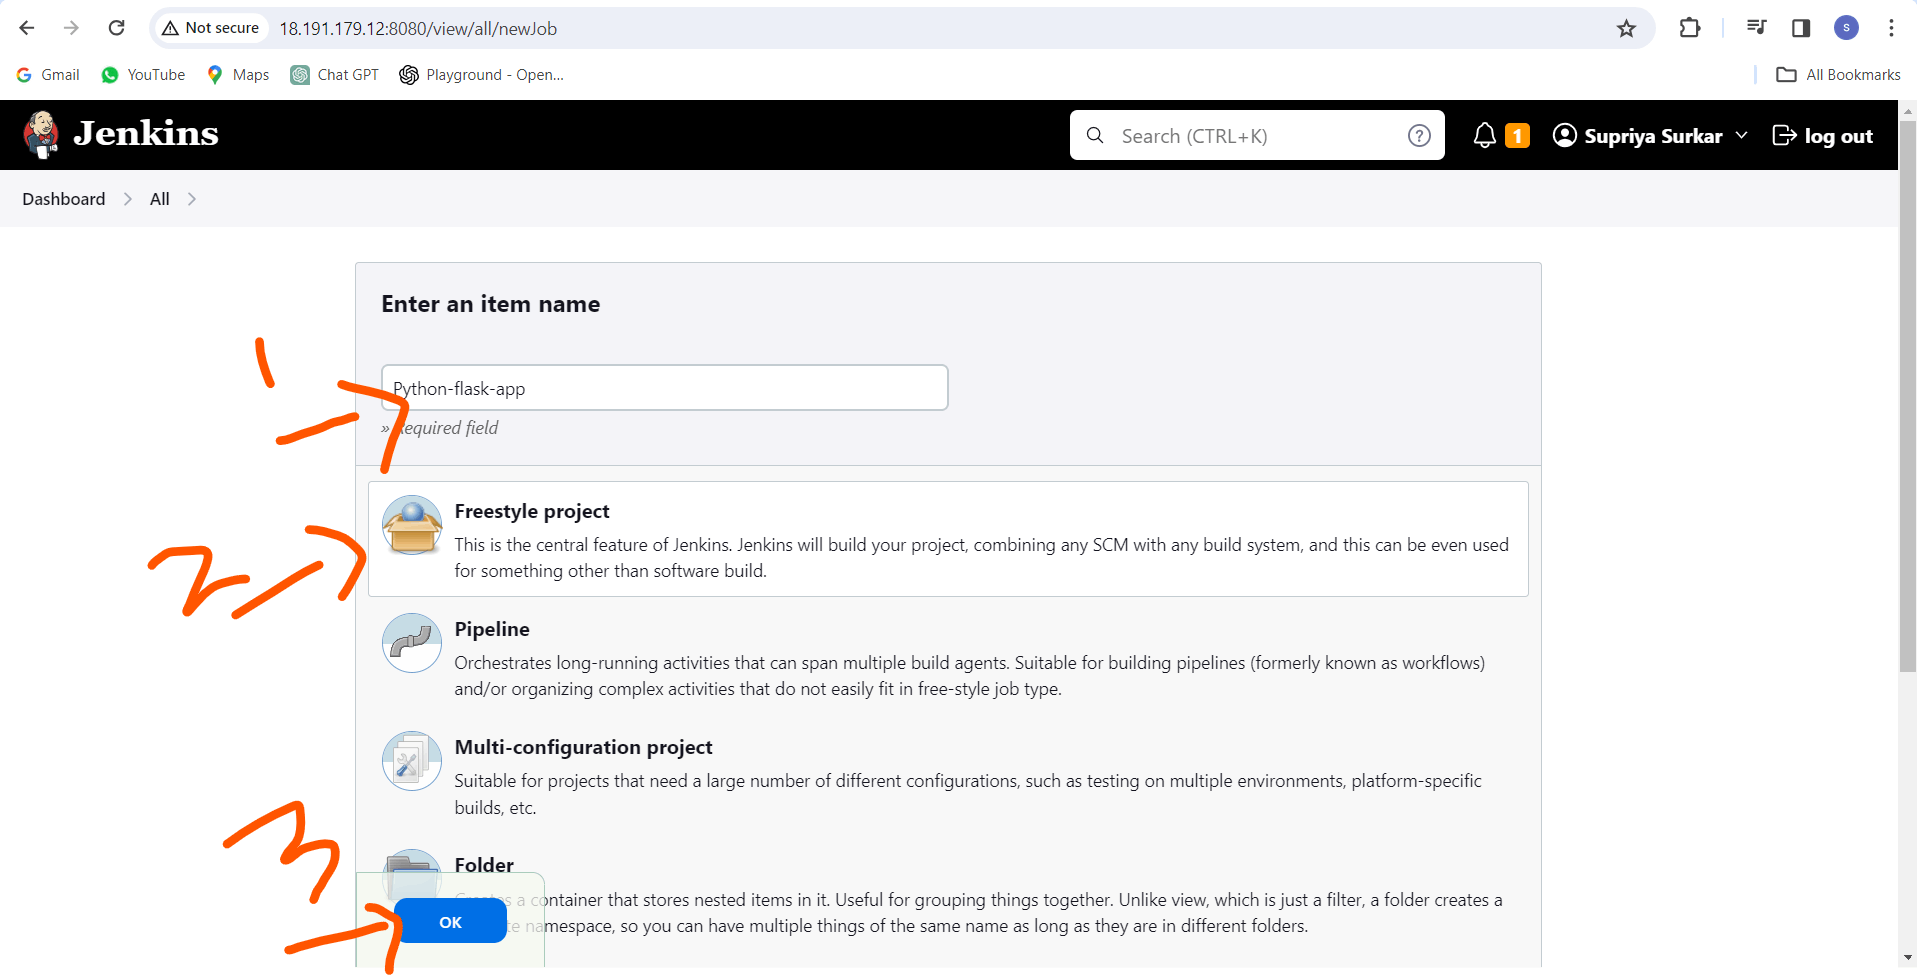
Input the project details, including the GitHub repository URL, and configure the necessary credentials to access it securely.


Save the configuration to create the new Jenkins item for your project.

Once saved, initiate the build process by clicking on the "Build Now" option.

After the build process completes, check the status to ensure it shows as "Build Successful."

Navigate to your EC2 instance and confirm whether the repository has been cloned successfully onto the instance.

Containerize Python Flask App:
Install Docker on your EC2 instance using below command:
sudo apt install docker.io
Create a Dockerfile for your Python Flask application specifying the necessary configurations.
  FROM python:3.9-slim

  # Set the working directory inside the container
  WORKDIR /app

  # Copy only requirements.txt to install dependencies
  COPY requirements.txt .

  # Install dependencies
  RUN pip install --no-cache-dir -r requirements.txt

  # Copy the rest of the application files into the container
  COPY . .

  # Expose port 5000 for web traffic
  EXPOSE 5000

  # Run the Flask app when the container starts
  CMD ["python", "app.py"]
Build a Docker image for your application using the Dockerfile.
sudo docker build . -t python-flask-app
Run a Docker container with the built image to ensure the application runs correctly.
sudo docker run -d --name Flask-app -p 5000:5000 python-flask-app
Try accessing it using the public IP address and port 5000.

Implement CI/CD Pipeline:
Integrate Docker Commands into Jenkins Pipeline Scripts:
Configure Jenkins to execute Docker commands as part of its pipeline scripts.
Go to Jenkins job < Build steps< Execute shell.

Define automation steps using Docker commands to build, test, and deploy the Python Flask application.

Build is successful. You can access it in your browser.


Configure GitHub Webhooks:
Set up GitHub Webhooks to automatically trigger Jenkins builds whenever there are new changes pushed to the GitHub repository.

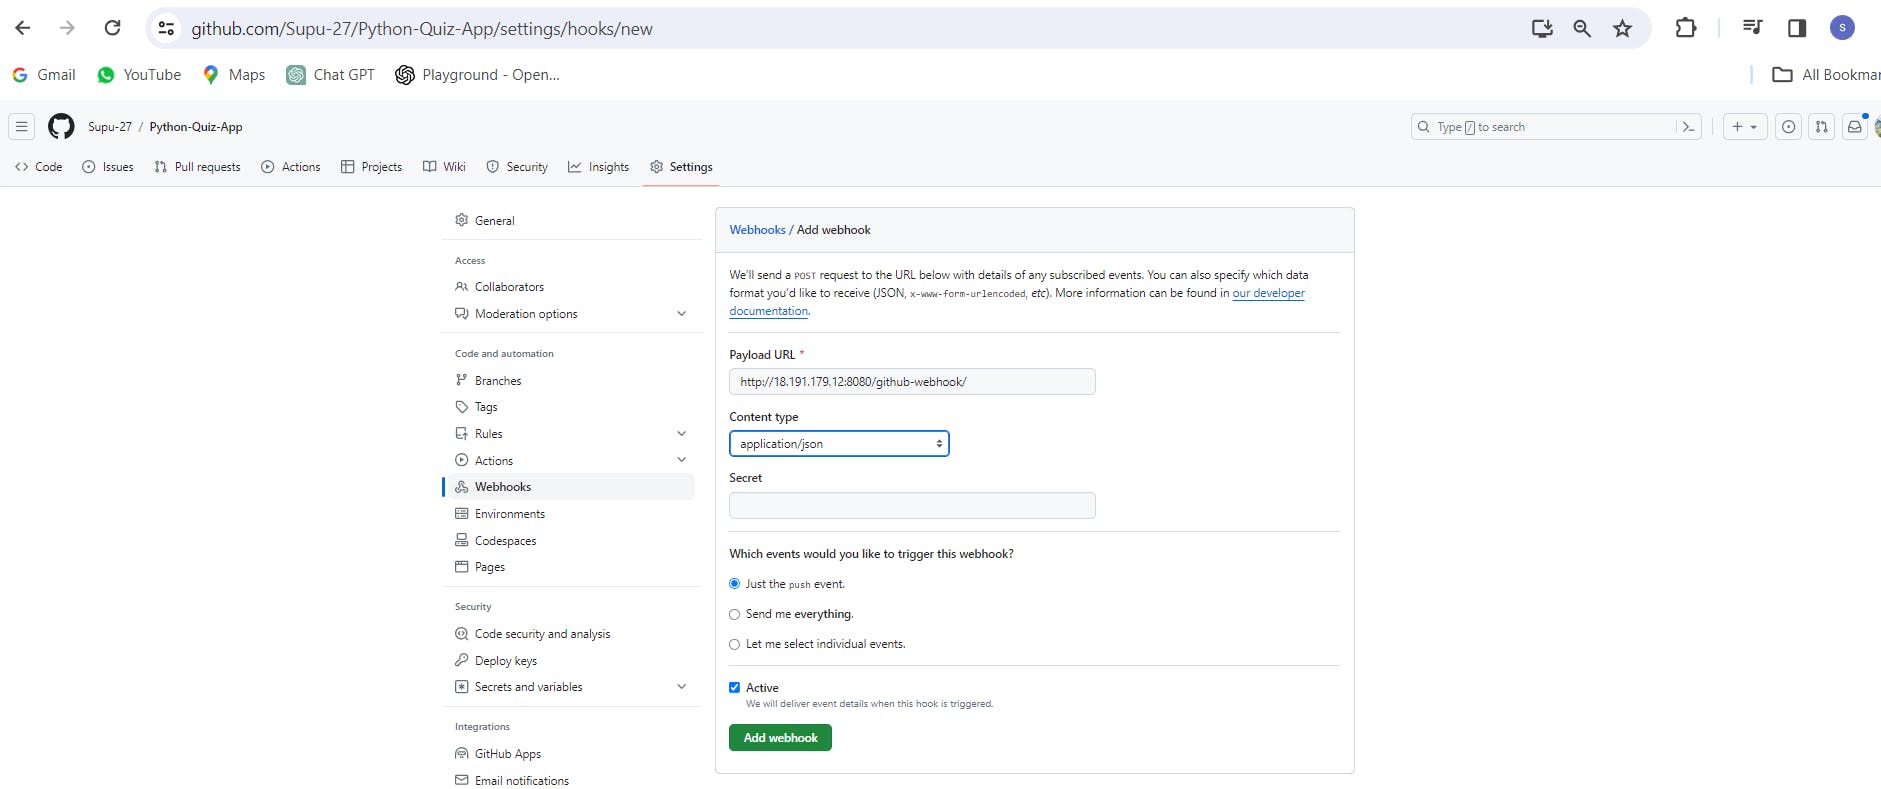
Configure the Jenkins-GitHub integration to listen for webhook events and initiate the CI/CD pipeline accordingly.

Task 02: Executing the CI/CD Pipeline
Ensure Docker Compose is Installed:
Verify that Docker Compose is installed on your system, as it's used for orchestrating multi-container Docker applications.

Create docker-compose.yaml File:
Define the services required for your Python Flask application in the docker-compose.yaml file, specifying ports and environment variables as needed.
  version: '3'

  services:
    web:
      image: supriya279/my-flask-app:latest
      ports:
        - "5000:5000"
      restart: always
      environment:
        - FLASK_APP=app.py
        - FLASK_ENV=production

    db:
      image: mysql:5.7  # Use a specific MySQL version
      ports:
        - "3306:3306"
      environment:
        - MYSQL_ROOT_PASSWORD=test@123
Execute CI/CD Pipeline in Jenkins:
Navigate to Jenkins Dashboard > Configure > Build Steps.
Include the necessary Docker commands within the build steps to execute the CI/CD pipeline, such as building Docker images and running Docker containers.
Caution: Before proceeding with the build, it's crucial to delete the previous containers. You can achieve this by using the
docker killcommand.
docker-compose down
docker-compose up --build -d
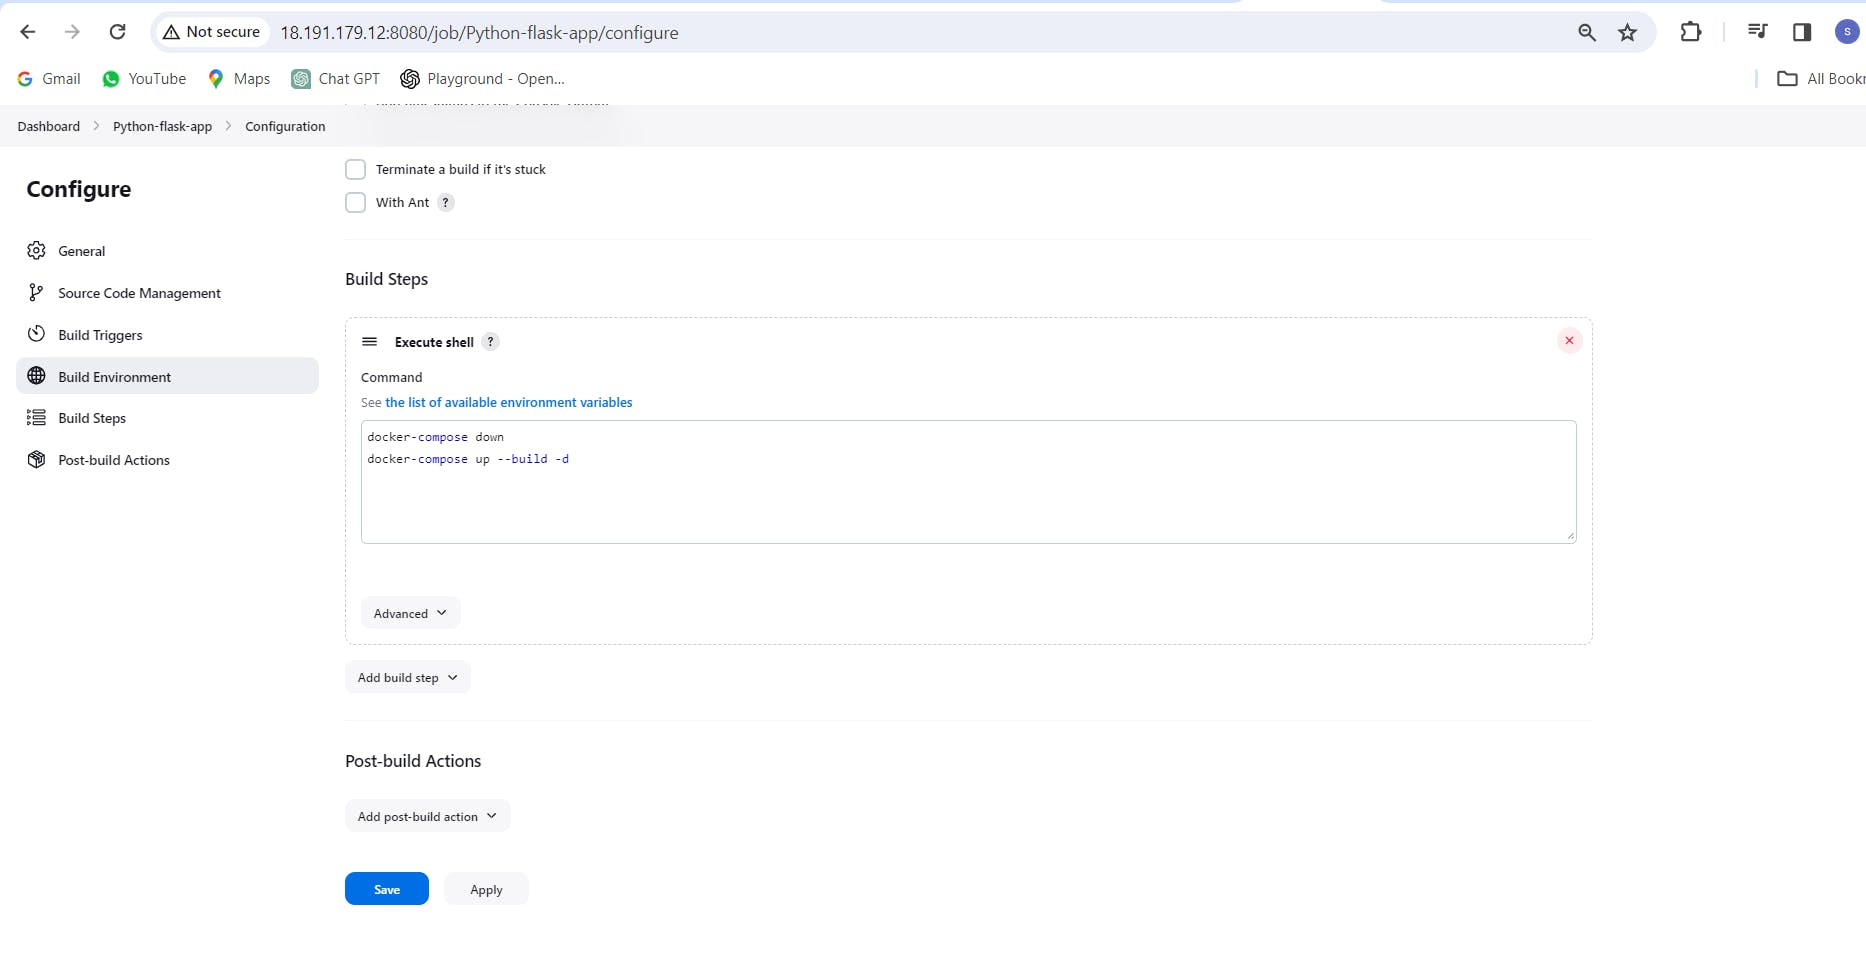
- Save and build. You'll notice that the build was successful.

Try accessing the application.

Congratulations! My application is now successfully running with Docker Compose.
You can verify that the container is created by running the 'docker-compose ps' command.

Conclusion:
Deploying a Python Flask app with Jenkins CI/CD on AWS streamlines the development process and ensures efficient delivery of changes to production. By leveraging Docker, GitHub integration, and automation tools like Jenkins, teams can achieve continuous integration and deployment, fostering collaboration and innovation in the DevOps environment.
